Install the Kotlin compiler for the command line on Windows
In this post, we’ll go over how to install the Kotlin compiler for the command line. If you’re using Android Studio or developing for mobile, you likely won’t need to install the Kotlin compiler for the command line.
Installing Java JDK
The first thing to consider is installing the Java JDK if you don’t already have it installed. Go to
On that page, we will select the option for Windows and download the installer

Once the file has been downloaded, simply double-click it to start the JDK installation. Complete the installation of the JDK.
Done! Now you can use Java.
Let’s install the Kotlin compiler for the command line
To install the Kotlin command-line compiler, first go to the Kotlin page at https://kotlinlang.org/docs/command-line.html. There, you’ll find the steps to follow for installing the compiler. Click on ‘GitHub Release.’
This will open a page similar to the one shown
Depending on the version released at that time.
If you prefer, you can go directly to the releases page at https://github.com/JetBrains/kotlin/releases and look for the latest release, skipping the previous steps.
On this page, download the latest release of the compiler:
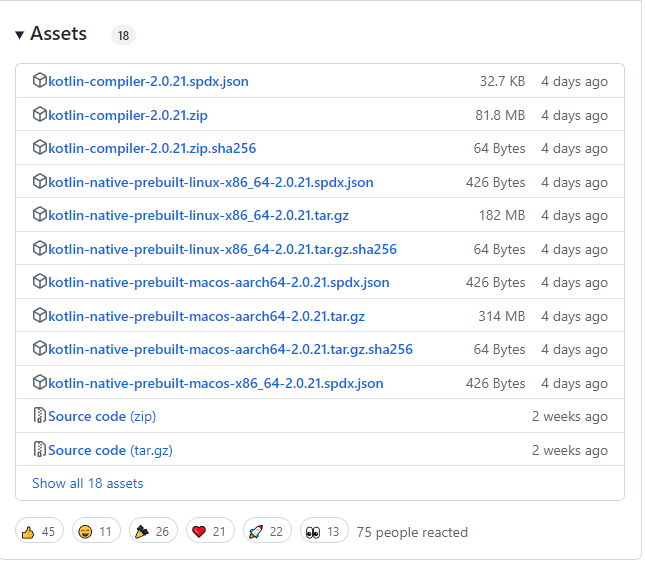
Once you have downloaded the compiler, extract it using WinRAR or 7zip. Windows also has its own built-in extraction tool from Windows 10 onward, if I remember correctly.
After extracting the file, you’ll have a folder with a name like ‘kotlin-compiler-2.0.21’ (this is just an example).
Go inside this folder.
You’ll find a folder named ‘kotlinc’ inside. Copy this folder to your ‘Program Files’ directory, which is usually located in the C: drive.
Once the folder is copied, follow the steps on the Kotlin page, which are:
Unzip the standalone compiler into a directory and optionally add the bin directory to the system path. The bin directory contains the scripts needed to compile and run Kotlin on Windows, macOS, and Linux.
kotlin
We have done the first part, how we do the second one?
Firstly, you need to go to environment variables: you can easily do this by typing ‘variable’ in the Windows search bar.
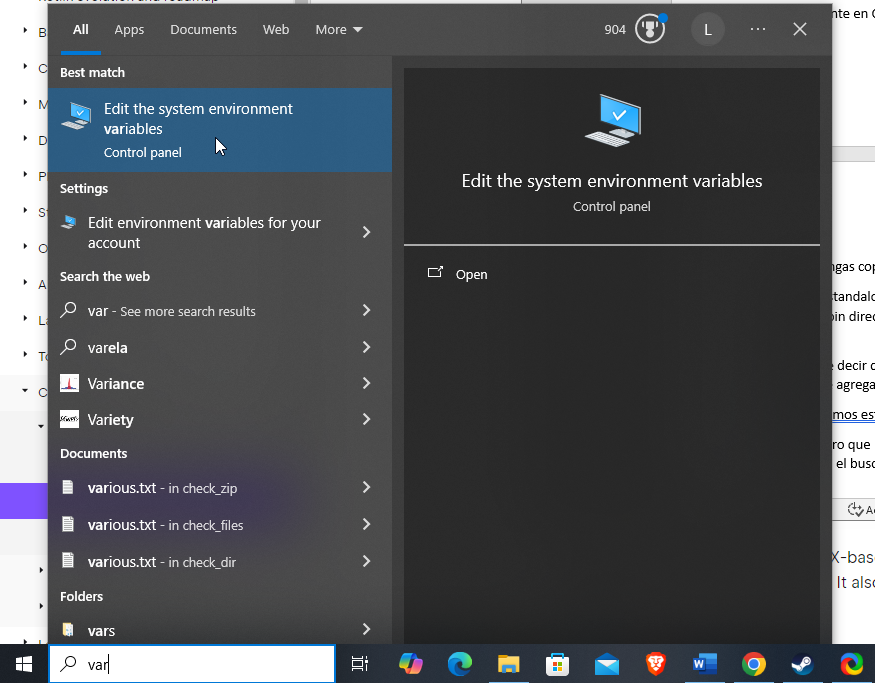
Once we click on environment variables, we will see the following:
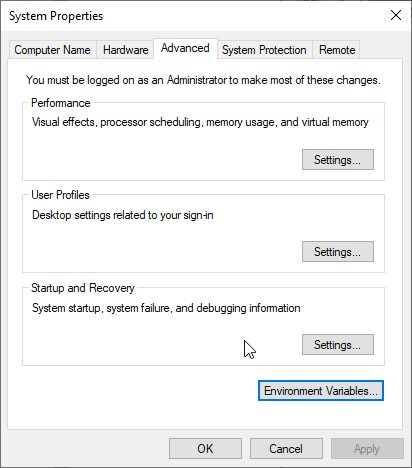
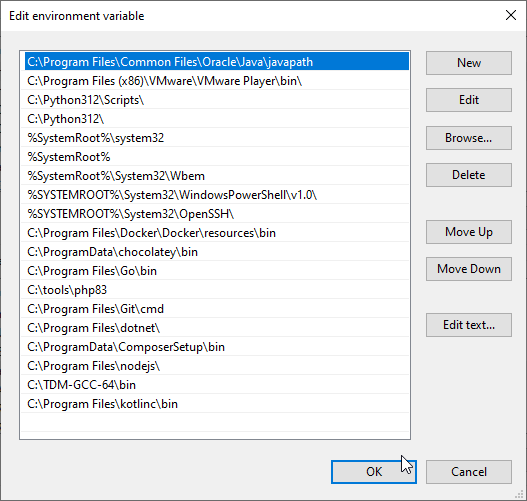
Click on environment variables, then find the system variables section and look for ‘Path’. Click on ‘Path’ and select ‘Edit’.
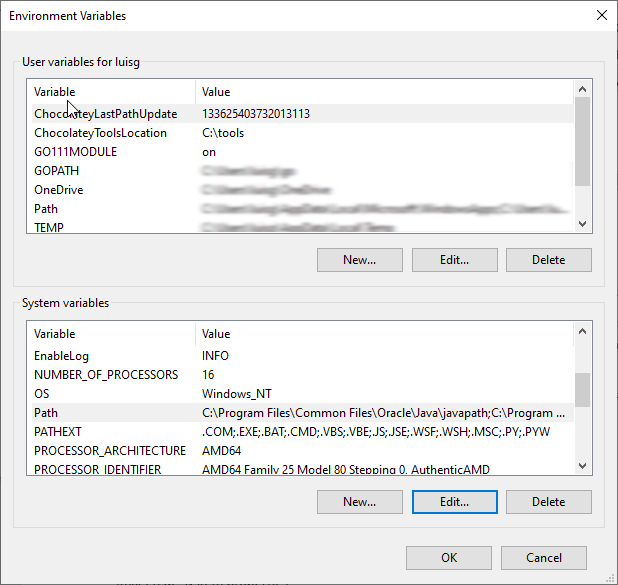
Once inside the edit window, select ‘New’ and add the path to your kotlinc bin directory.
Now check if Kotlin compiler works correctly on your console with the command kotlinc -help.
If works congratulations !!, now we can check these more deeper lets take an example of code at kotlinlang.org: This example seem pretty good.
// Prints a message to request input
println("Enter any word: ")

// Reads and stores the user input. For example: Happiness
val yourWord = readln()

// Prints a message with the input
print("You entered the word: ")

print(yourWord)
// You entered the word: Happiness
hum? We need a main function to make this work and probably a package for that readln() let me do some changes:
pproject.kt
import kotlin.text.*

// Prints a message to request input
fun main(){
println("Enter any word: ")

// Reads and stores the user input. For example: Happiness
val yourWord = readln()

// Prints a message with the input
print("You entered the word: ")
print(yourWord)
// You entered the word: Happiness
}
? it seems that we don’t need that package so you can delete the import
Now we have our little program, we need to compile it right?
Let’s go to our console where is our project, and compile it:
kotlinc pproject.kt -include-runtime -d pproject.jar
What’s happen here is that the compiler is converting our code to java, now we can run our project without problems with the following line:
java -jar pproject.jar


It´s probably that you need to restart your system to get this change completely, so do not get worried if not work without restart. Restart your PC
Check again if the compiler works running
kotlin -help