Blog de programación, errores, soluciones
Gio GUI – Split Widget (golang)
If you have been interested in the Gio graphical interface, maybe this is one of the first things you have tried to do. However, as we will see, it is not as easy, and the section that covers this topic is not as comprehensive as we would like. Therefore, we will need to do some further reading to understand how to make separations in this interface.
Introducción
To begin with, I will tell you that it doesn’t provide us with a ready-made main function to quickly understand the Gio split widget. However, we can create our own main function by reading a bit in the “Get Started” section. If we follow these steps, we will see that creating our main function looks something like this:
main.go function main()
func main() {
	go func() {
		w := app.NewWindow()// crea una nueva ventana
		err := run(w)
		if err != nil {
			log.Fatal(err)//da un error fatal
		}
		os.Exit(0)//termina el proceso de la go routine esto no terminara el programa
	}()
	app.Main()
}
So far so good, we have our main function that creates a window, runs the run() function, and if it returns an error, it exits the program. Note that all of this is done within a Go routine, so when we execute os.Exit(0), it will terminate the process, not the entire program.
The line that calls app.Main will start the lifecycle of the application. It will initialize the application, set up the event handlers, and start the main event loop, where the application will listen for user input and update the UI accordingly. This is the point where the application becomes interactive and responds to user actions.
Having understood all of this, we should now proceed to what would be our run() function. Let’s see how it would be.
func run(w *app.Window) error {
	th := material.NewTheme(gofont.Collection())
        var ops op.Ops
        for {
		e := <-w.Events()
		switch e := e.(type) {
		case system.DestroyEvent:
			return e.Err
		case system.FrameEvent:
			// This graphics context is used for managing the rendering state.
			gtx := layout.NewContext(&ops, e)

			// Define an large label with an appropriate text:
			title := material.H1(th, "Hello, Gio")

			// Change the color of the label.
			maroon := color.NRGBA{R: 127, G: 0, B: 0, A: 255}
			title.Color = maroon

			// Change the position of the label.
			title.Alignment = text.Middle

			// Draw the label to the graphics context.
			title.Layout(gtx)

			// Pass the drawing operations to the GPU.
			e.Frame(gtx.Ops)
		}
	}
}
This function is simpler than it seems at first glance. The only difficulty you may see is the <- symbol, which indicates a channel operation that we don't see being created.
Additionally, we have the ops variable that we dont know what it is at this moment, the switch statement, it is a type switch and doesn't pose much difficulty.
The channel is likely used for communication purposes.
As you can see, ops is from the op (operations) package. This variable will hold a list of operations to update the graphical interface.
Our gtx variable will be a layout.Context, and the rest of the code doesn't do much more than setting the title, color, layout, and frame.
If we run this code with go run ., what we currently have should appear on the screen as follows:
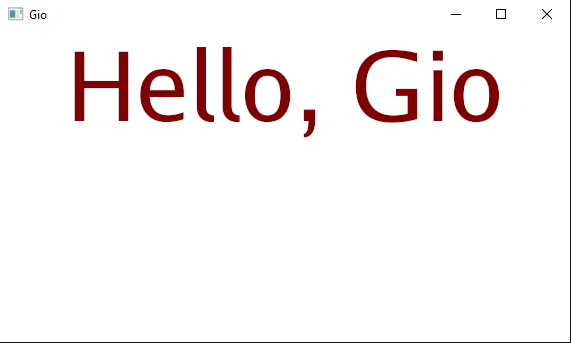
Split Widgets of GIO GUI
When we need a custom design for a widget or layout, we will use split widgets. This doesn't mean that you can't create separations with layouts, but often we prefer split widgets because they offer more customization options.
In this section, we will first explore what GIO provides in its tutorial for creating a split widget. The downside is that it may not be as comprehensive as we would like. However, if you read about layouts and get started with GIO, you will likely find what you need.
The first thing we will need is a structure to create the split, our object, if you will.
main.go estructura SplitVisual
type SplitVisual struct{}
After this line, we have a type called SplitVisual where we can define methods, and that's exactly what the following code does by adding a Layout method to it.
func (s SplitVisual) Layout(gtx layout.Context, left, right layout.Widget) layout.Dimensions {
	leftsize := gtx.Constraints.Min.X / 2
	rightsize := gtx.Constraints.Min.X - leftsize

	{
		gtx := gtx
		gtx.Constraints = layout.Exact(image.Pt(leftsize, gtx.Constraints.Max.Y))
		left(gtx)
	}

	{
		gtx := gtx
		gtx.Constraints = layout.Exact(image.Pt(rightsize, gtx.Constraints.Max.Y))
		trans := op.Offset(image.Pt(leftsize, 0)).Push(gtx.Ops)
		right(gtx)
		trans.Pop()
	}

	return layout.Dimensions{Size: gtx.Constraints.Max}
}
We won't analyze this function, but what we can say is that inside it, the splitting we want happens.
In the following code, we can see how the exampleSplitVisual function creates our SplitVisual object.
func exampleSplitVisual(gtx layout.Context, th *material.Theme) layout.Dimensions {
	return SplitVisual{}.Layout(gtx, func(gtx layout.Context) layout.Dimensions {
		return FillWithLabel(gtx, th, "Left", red)
	}, func(gtx layout.Context) layout.Dimensions {
		return FillWithLabel(gtx, th, "Right", blue)
	})
}
We also need to consider the following function, as it will create the labels and the ColorBox.
func FillWithLabel(gtx layout.Context, th *material.Theme, text string, backgroundColor color.NRGBA) layout.Dimensions {
	ColorBox(gtx, gtx.Constraints.Max, backgroundColor)
	return layout.Center.Layout(gtx, material.H3(th, text).Layout)
}
Now we can see that within FillWithLabel, we call the ColorBox function, so we will need this function. However, it is not part of the layout package. So, after some research, we found that they provide this function in the Layouts documentation, even though it is not included by default. Therefore, we will have to create it ourselves.
// Test colors.
var (
	background = color.NRGBA{R: 0xC0, G: 0xC0, B: 0xC0, A: 0xFF}
	red        = color.NRGBA{R: 0xC0, G: 0x40, B: 0x40, A: 0xFF}
	green      = color.NRGBA{R: 0x40, G: 0xC0, B: 0x40, A: 0xFF}
	blue       = color.NRGBA{R: 0x40, G: 0x40, B: 0xC0, A: 0xFF}
)

// ColorBox creates a widget with the specified dimensions and color.
func ColorBox(gtx layout.Context, size image.Point, color color.NRGBA) layout.Dimensions {
	defer clip.Rect{Max: size}.Push(gtx.Ops).Pop()
	paint.ColorOp{Color: color}.Add(gtx.Ops)
	paint.PaintOp{}.Add(gtx.Ops)
	return layout.Dimensions{Size: size}
}
Let's put everything together and see what we have. Excellent, although there is some extra code.
package main

import (
	"image"
	"image/color"
	"log"
	"os"

	"gioui.org/app"
	"gioui.org/font/gofont"
	"gioui.org/io/system"
	"gioui.org/layout"
	"gioui.org/op"
	"gioui.org/op/clip"
	"gioui.org/op/paint"
	"gioui.org/text"
	"gioui.org/widget/material"
)

var (
	background = color.NRGBA{R: 0xC0, G: 0xC0, B: 0xC0, A: 0xFF}
	red        = color.NRGBA{R: 0xC0, G: 0x40, B: 0x40, A: 0xFF}
	green      = color.NRGBA{R: 0x40, G: 0xC0, B: 0x40, A: 0xFF}
	blue       = color.NRGBA{R: 0x40, G: 0x40, B: 0xC0, A: 0xFF}
	gtx        layout.Context
	th         *material.Theme
)

type SplitVisual struct {
}

func (s SplitVisual) Layout(gtx layout.Context, left, right layout.Widget) layout.Dimensions {
	leftsize := gtx.Constraints.Min.X / 2
	rightsize := gtx.Constraints.Min.X - leftsize

	{
		gtx := gtx
		gtx.Constraints = layout.Exact(image.Pt(leftsize, gtx.Constraints.Max.Y))
		left(gtx)
	}

	{
		gtx := gtx
		gtx.Constraints = layout.Exact(image.Pt(rightsize, gtx.Constraints.Max.Y))
		trans := op.Offset(image.Pt(leftsize, 0)).Push(gtx.Ops)
		right(gtx)
		trans.Pop()
	}

	return layout.Dimensions{Size: gtx.Constraints.Max}
}

func main() {
	go func() {
		w := app.NewWindow()
		err := run(w)
		if err != nil {
			log.Fatal(err)
		}
		os.Exit(0)
	}()
	app.Main()
}

func run(w *app.Window) error {
	th := material.NewTheme(gofont.Collection())
	var ops op.Ops
	for {
		e := <-w.Events()
		switch e := e.(type) {
		case system.DestroyEvent:
			return e.Err
		case system.FrameEvent:
			// This graphics context is used for managing the rendering state.
			gtx := layout.NewContext(&ops, e)

			// Define an large label with an appropriate text:
			title := material.H1(th, "Hello, Gio")

			// Change the color of the label.
			maroon := color.NRGBA{R: 127, G: 0, B: 0, A: 255}
			title.Color = maroon

			// Change the position of the label.
			title.Alignment = text.Middle

			// Draw the label to the graphics context.
			title.Layout(gtx)
			exampleSplitVisual(gtx, th)
			// Pass the drawing operations to the GPU.
			e.Frame(gtx.Ops)
		}
	}

}

func exampleSplitVisual(gtx layout.Context, th *material.Theme) layout.Dimensions {
	return SplitVisual{}.Layout(gtx, func(gtx layout.Context) layout.Dimensions {
		return FillWithLabel(gtx, th, "Left", red)
	}, func(gtx layout.Context) layout.Dimensions {
		return FillWithLabel(gtx, th, "Right", blue)
	})
}

func FillWithLabel(gtx layout.Context, th *material.Theme, text string, backgroundColor color.NRGBA) layout.Dimensions {
	ColorBox(gtx, gtx.Constraints.Max, backgroundColor)
	return layout.Center.Layout(gtx, material.H3(th, text).Layout)
}

func ColorBox(gtx layout.Context, size image.Point, color color.NRGBA) layout.Dimensions {
	defer clip.Rect{Max: size}.Push(gtx.Ops).Pop()
	paint.ColorOp{Color: color}.Add(gtx.Ops)
	paint.PaintOp{}.Add(gtx.Ops)
	return layout.Dimensions{Size: size}
}
Let's see how it works. We run go build and go run ., and our result is as follows:
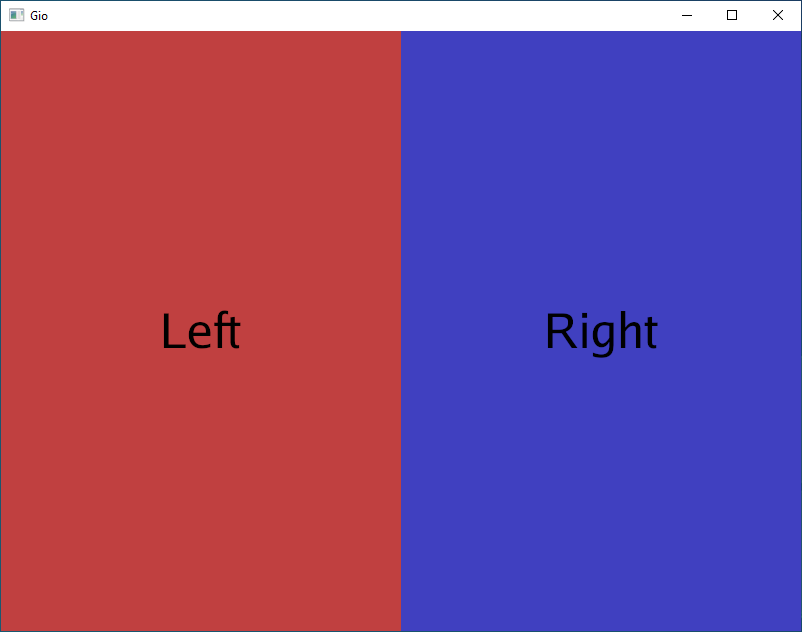
What we can see here is that it has overridden the title we set at the beginning, but that's a problem of not specifying the contexts properly.
If you want an exercise on this, simply rewrite it, make it vertical, and fix the aforementioned issue.
Reference: https://gioui.org/doc/learn/split-widget


If and else in Go Language
The switch Statement in Go
Creating WordPress Block Themes: Step by Step
WordPress block themes - Predefined styles
News