Axios and Laravel
In this post we will see how to use Axios and Laravel. By default, Laravel comes with Axios and Bootstrap.
In this case, the default case you have not to do anything you can use post with Axios cause Laravel come with code that obtain the csrf-token for you and add it to header that will be passed.
Another case is when you will not to use the default code used by Laravel and complete erase bootstrap, in this case you will need to obtain the csrf-token.
var laravelToken = document.querySelector('meta[name="csrf-token"]').getAttribute('content');
This will create a laravelToken variable and asign the csrf-token, then you will have to use this one in the header. For example:
axios.post('https://example.com', form, { headers: 'X-CSRF-TOKEN':laravelToken })
The code above is illustrative, form are data from our form.
GET
In this example we will change a text pressing a button doing an Axios get request.
First ill make a route called example:
Route::get('example',function(){
 return view("example");
});
Now we need to create a controller “ClientController” and I will add the next method.
public function message(){
        return "Hola gracias por entrar a este articulo";
}
Route::get('/cliente/message','ClienteController@message');
use App\Http\Controllers\ClienteController;
Route::get('/cliente/message',[ClienteController::class,'message']);
the view
Let’s create the view, in my case i will call it “example”, in this view we will have the button that will call change_message function that’s gonna done an Axios request.
If you check the following code you will found @include(‘tochange’), this is another view. This tipe of view are called partial views, and I’m going to add it forward.
<!doctype html>
<html lang="en">
<head>
<meta charset="utf-8">
<title>Utilizando ajax con Axios</title>
<meta name="description" content="Utilizando ajax con Axios">
<meta name="author" content="Blastcoding">
<link rel="stylesheet">
</head>
<body>
<input type="button" name="" id="btnajax" class="btn btn-primary" role="button" onclick="change_message()" value="click me">
@include("tochange")
<script src={{ asset('js/app.js')}}></script>
<script>
function change_message(){
    axios.get('/cliente/message')
    .then(function (response) {
        // handle success
        console.log(response);
    })
    .catch(function (error) {
        // handle error
        console.log(error);
    });
}
</script>
</body>
</html>
A partial view
Now it’s time to make our partial view “tochange”.
<div id="mycontent">
 All my content goes here my friend
</div>
Compiling Assets
Before check what we are doing we have to make the preprocess of our javascript libraries, Laravel uses NPM to install libraries
npm install
npm run dev
Running and checking with browser inspector
To check all this just run the server with php artisan serve and add the following URL on your browser http://localhost:8000/example then open the inspector and go to network tab, depending on the browser you can open easily with right click and selecting inspect element.
When you check in your console you will see something like this.

if you check and gives you something similar to the image above, you can continue.
Modifying our files to show something
As you can see the Axios code is only the following.
<script>
function change_message(){
    axios.get('/cliente/message')
    .then(function (response) {
        // handle success
        console.log(response);
    })
    .catch(function (error) {
        // handle error
        console.log(error);
    });
}
</script>
Then change the code to change our text when click the button. In this example I use innerHTML only to simplify, it’s not recommended using it in a software that is in production state, beware of that.
function change_message(){
    axios.get('/cliente/message',{responseType:'html'})
    .then(function (response) {

        var contentdiv = document.getElementById("mycontent");
        contentdiv.innerHTML=response.data;

    })
    .catch(function (error) {
        // handle error
        console.log(error);
    });
}
In the code I select the element id= mycontent and asign the data from the response.
We need to do some modification to tochange.blade.php too:
<div id="mycontent">
@if(isset($message))
    {{$message}}
@else
 All my content goes here my friend
@endif
</div>
Next, we need to change the message method on the controller:
app/Http/Controllers/ClienteController.phppublic function message(){
$message = "Hola gracias por entrar a este articulo";
return $message;
}
With this changes our example should already work clicking button “click me”
POST
In case of use Axios with the configuration by default we not need to pass or obtain the CSRF, Laravel does it for us.

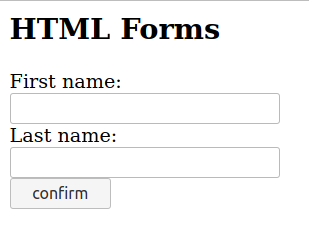
Leave here a simple example, a form using Axios.
Route::get('formulary',function(){
   return view('formulary');
});
<head>
<meta name="csrf-token" content="{{ csrf_token() }}">
</head>
<body>
<h2>HTML Forms</h2>

<div>
  <label for="form_name">First name:</label><br>
  <input type="text" id="form_name" name="name"><br>
  <label for="form_surname">Last name:</label><br>
  <input type="text" id="form_surname" name="surname"><br><br>
  <button onclick='proccess();'>confirm</button>
</div>
<script src="https://cdn.jsdelivr.net/npm/axios/dist/axios.min.js"></script>
<script>
function proccess(){
   var laravelToken = document.querySelector('meta[name="csrf-token"]').getAttribute('content');
   axios.post('/proccess', {
    name: document.getElementById('form_name').value,
    surname: document.getElementById('form_surname').value,
  })
  .then(function (response) {
    console.log(response.data);
  })
  .catch(function (error) {
    console.log(error);
  });
   ;
};
</script>
</body>
Now I will need a route “proccess”. Remember to use Request as I’m using in the example you need to add the following line.
use Illuminate\Http\Request;
Route::post('proccess',function(Request $request){
   $name = $request->input('name');
   $surname = $request->input('surname');
   echo "tu nombre es $name y tu apellido es $surname";
});


